Set up teams and queues
The scheduling boards show people because someone put them on a team, and time-off requests reach the right approvers because someone filled two queues. This is that setup. Plan on ten minutes the first time.
Before you start
- The Admin area needs the admin role. Team membership changes need the settings manage permission; queue membership needs queue manage.
Steps: teams
-
Open Admin, then Teams. Teams are your departments: flower production, carpentry, props, delivery, design. Add one with the name your shop actually uses.
-
Click Manage on a team and add its people. A person can be on several teams.
-
Tick Manager on whoever runs the team’s board. A star marks them, and more than one manager is fine (two carpentry leads work exactly as you would hope).
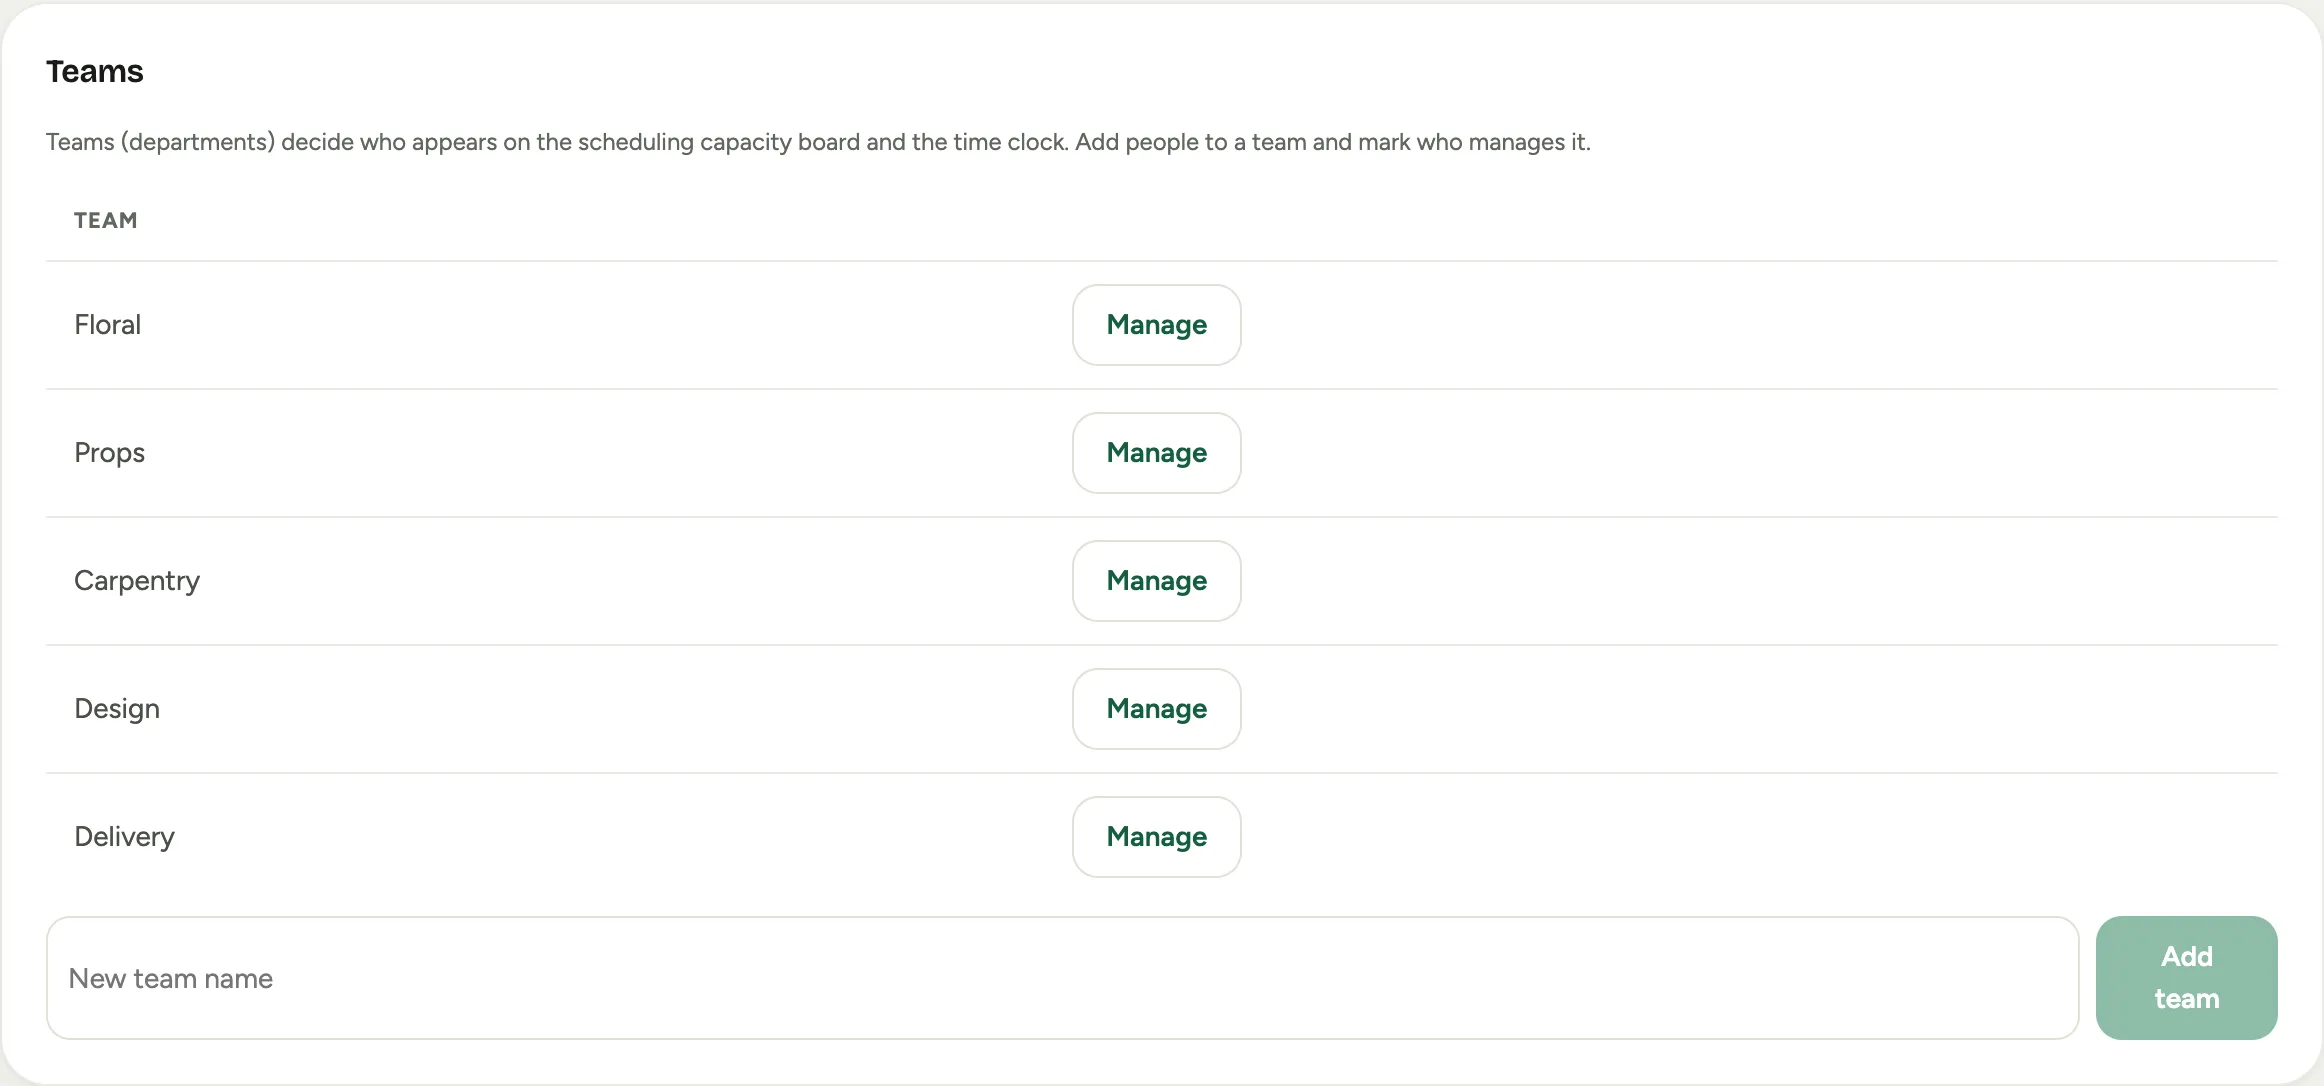 Screenshot from a demo workspace; data illustrative.
 -
Teams decide who appears on the Capacity board and the time clock, so if someone is missing from a board, this screen is almost always why.
Steps: queues
-
Open Admin, then Auto-routing. The Lead assignment card sets how new leads spread across your sales reps: round-robin or by load.
-
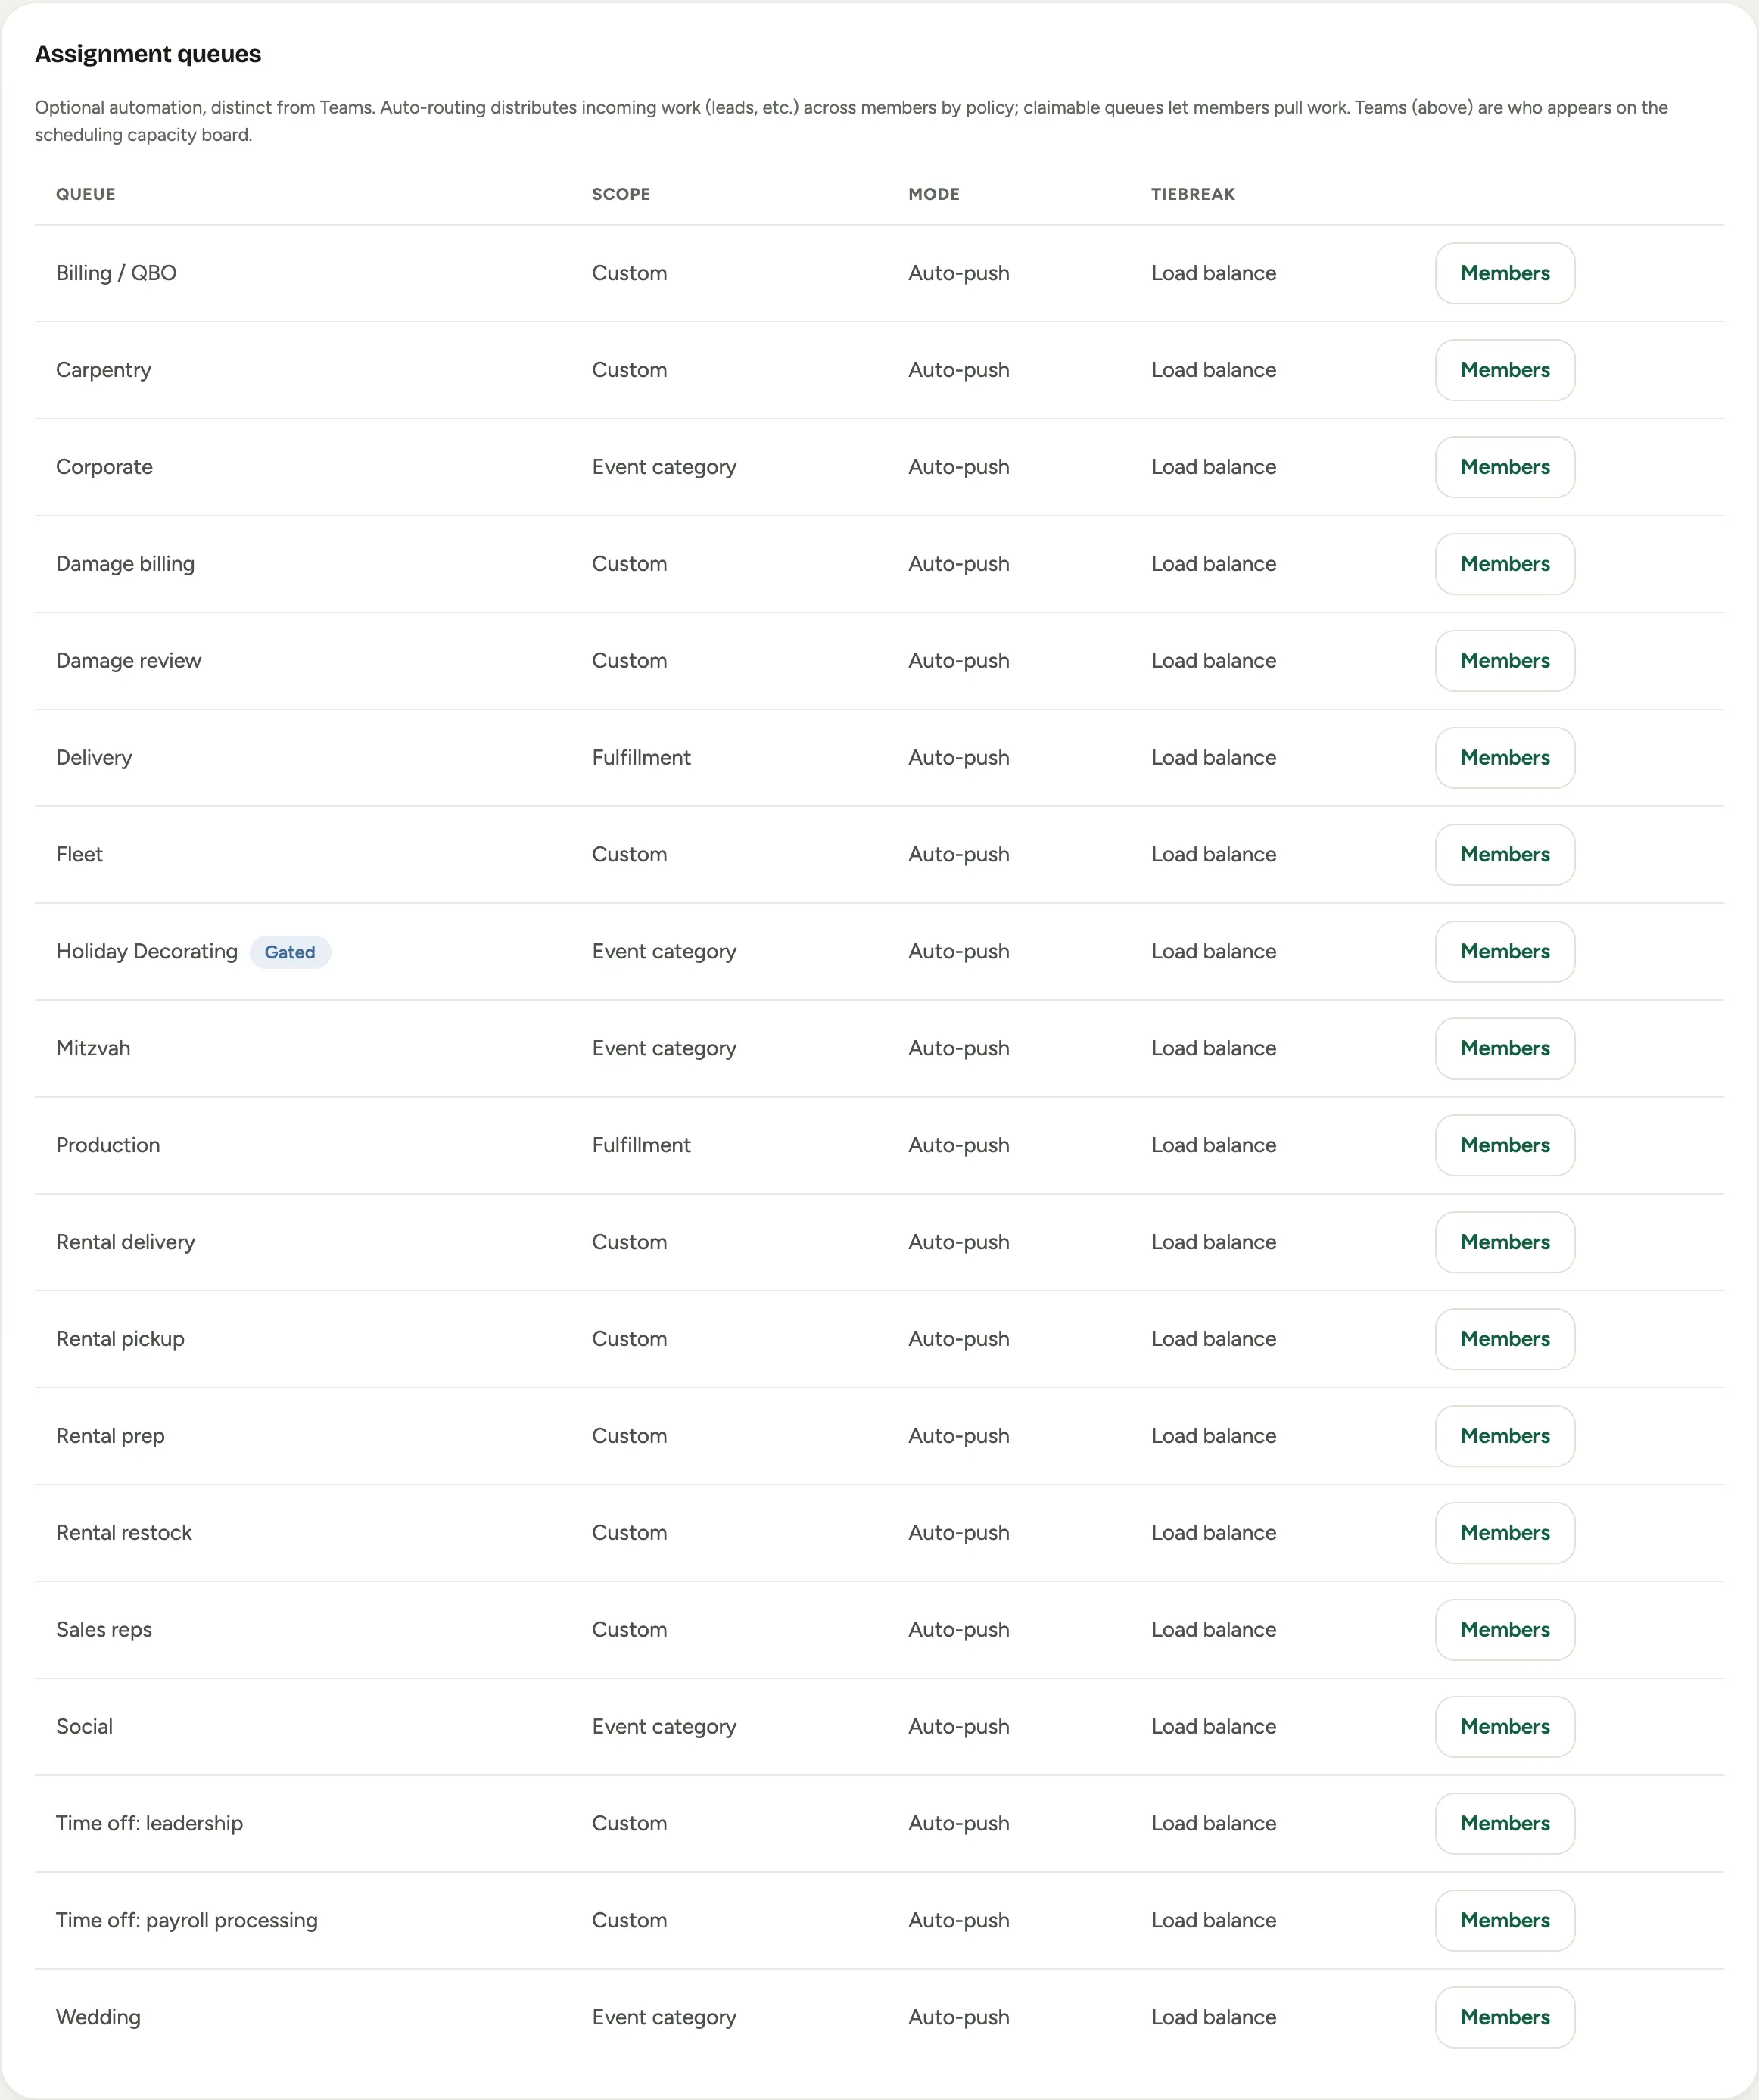
The Assignment queues table routes everything else. Click Members on a queue to manage who is in it, their weight, and whether they are currently taking work.
-
Fill the two time-off queues before anyone requests leave: the leadership queue is your final approvers (all of them must approve), and the payroll queue is whoever records the time in your payroll system.

Good to know
- Teams and queues are different tools: teams put people on scheduling boards, queues distribute incoming work. The Auto-routing page says exactly this at the top, because everyone asks.
- An empty time-off queue does not strand requests; they fall back to your HR fallback until you fill it. Fill it anyway.
- Vehicles and driver authorizations have their own guide: Add a vehicle and authorize drivers.
- Where this fits: Scheduling: crews, the backlog, and the week and Tasks, follow-ups, and reply SLAs.